Notifications system
The notification system has two fundamental functions: 1) working as a reminder, notifying users that a certain collection must be performed or sending several reminder notices (Scheduling notifications) and 2) notifying users when a certain event occurs (Event notifications). In the following sections, we will address these two uses of the tool.
1) Scheduling notifications
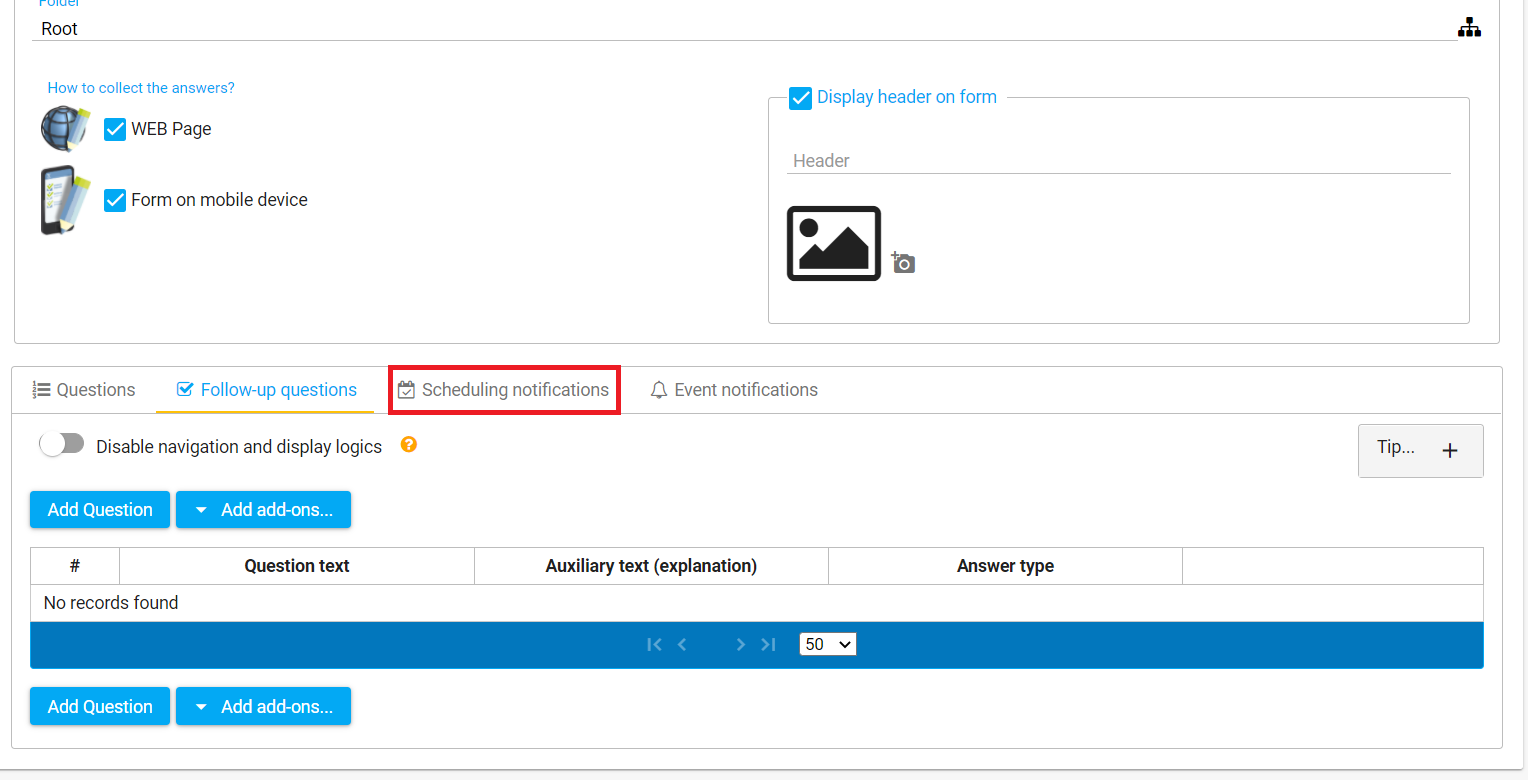
In the form editing screen, select “Scheduling notifications”:
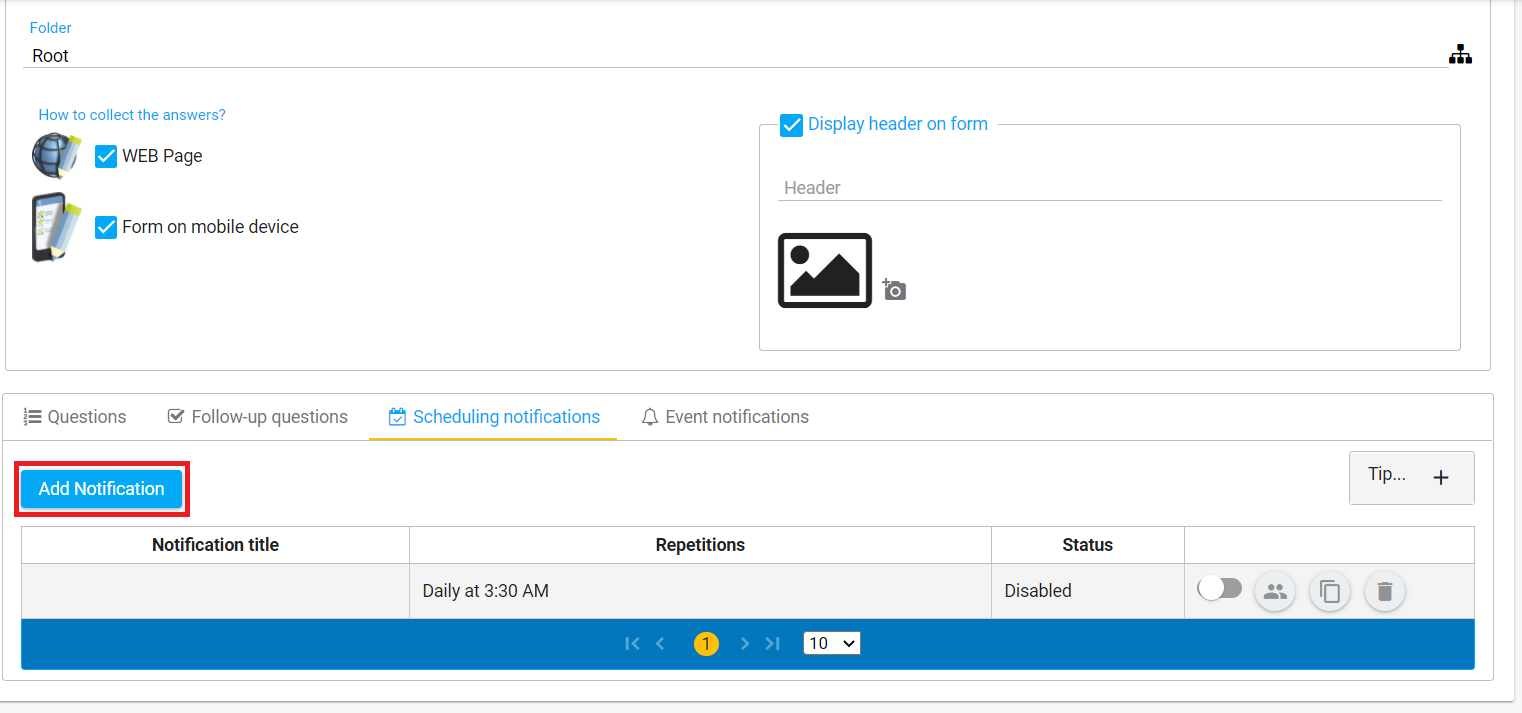
Then select “add notification”:
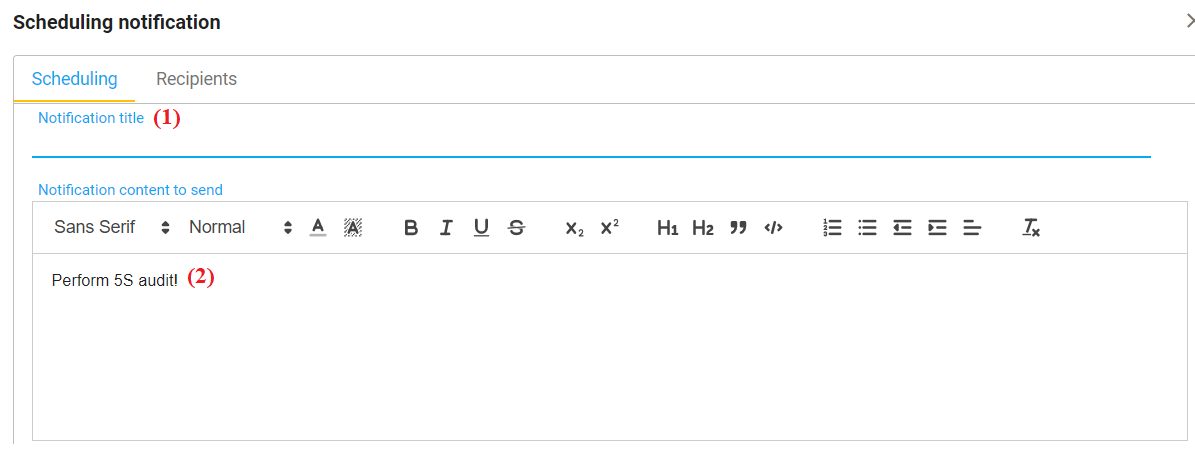
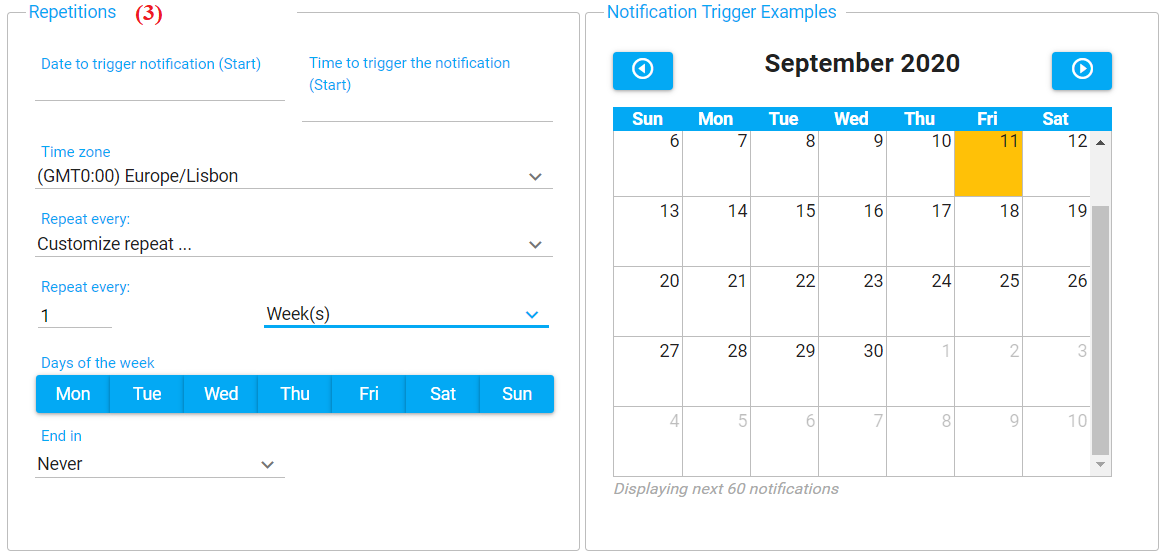
The notification screen by scheduling will appear, where it is possible to enter a title for the notification (1), the message content (2) and the triggering mechanism (3), configuring time, date and timezone, as shown in the figure below:
After configuring items (1), (2) and (3), select “recipients” to set up who will receive the notification created and the notification method: email or push (via app) or both.
Set up the recipients
To notify users via email, select the check box  corresponding to the user.To notify users via App, select the check box
  corresponding to the user. It is also possible to check both, as in the example below:
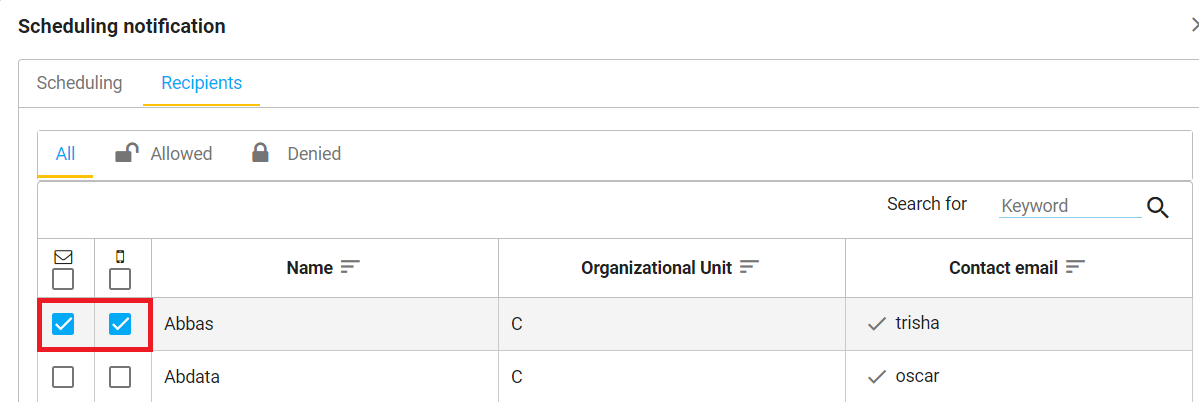
If the icon  appears in the e-mail field instead of the checkbox, it means that the e-mail has not been confirmed by the user. In this case, you must confirm the email to show the check box (when an email is registered in the system when the user is created, hashdata sends an automatic confirmation email).
If the icon  appears in the app field instead of the checkbox, it means that the user does not have the app installed. In this case, you must install the App to show the check box.
2) Event notifications
In the form editing screen, select “Event notifications”:
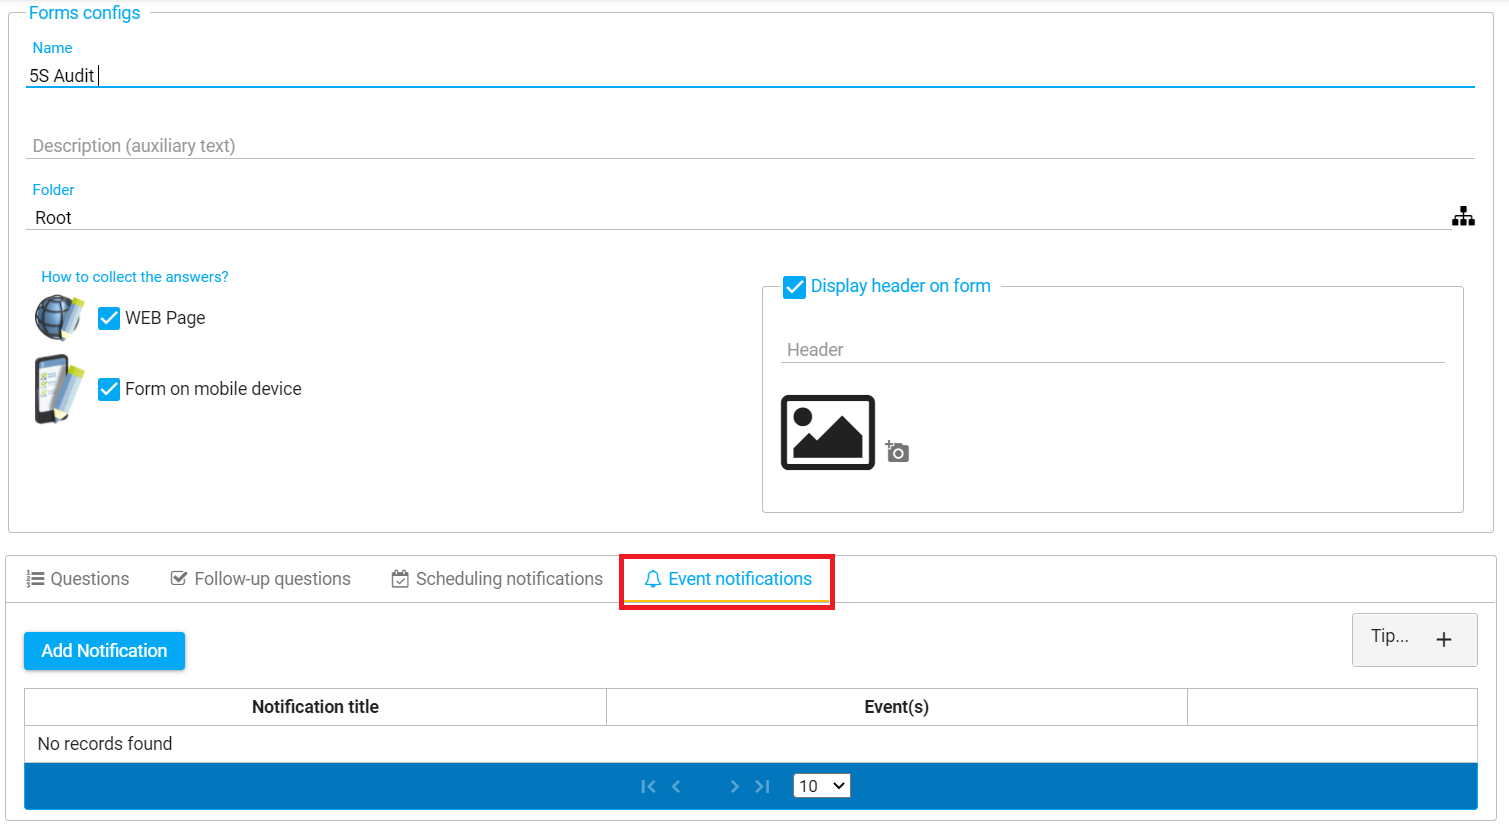
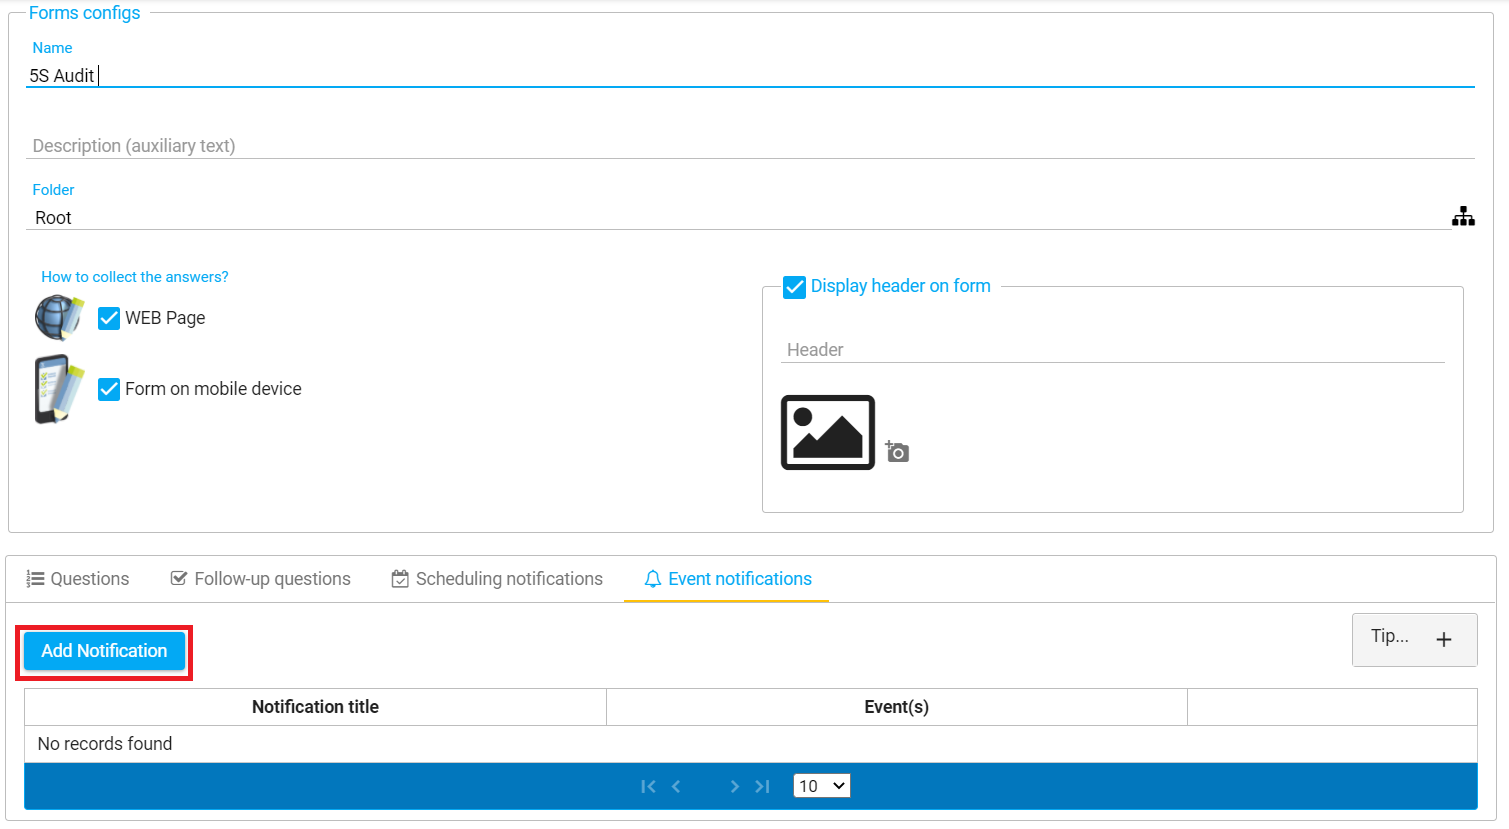
Then select “add notification”:
Select the trigger type for the notification:
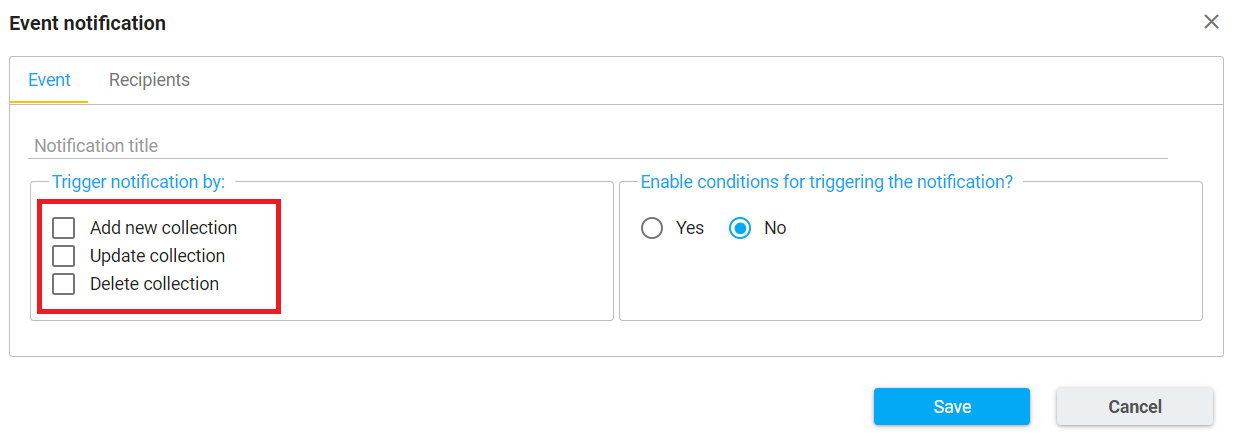
In the “Add new collection” trigger, the notification will be triggered every time a collection is performed.
In the “Update collection” trigger, the notification will be triggered every time a collection already made is modified.
In the “Delete collection” trigger, the notification will be triggered every time a collection is deleted on the form.
In addition to these options, it is possible to customize the events by selecting “yes” in the trigger conditions, as shown in the image below:
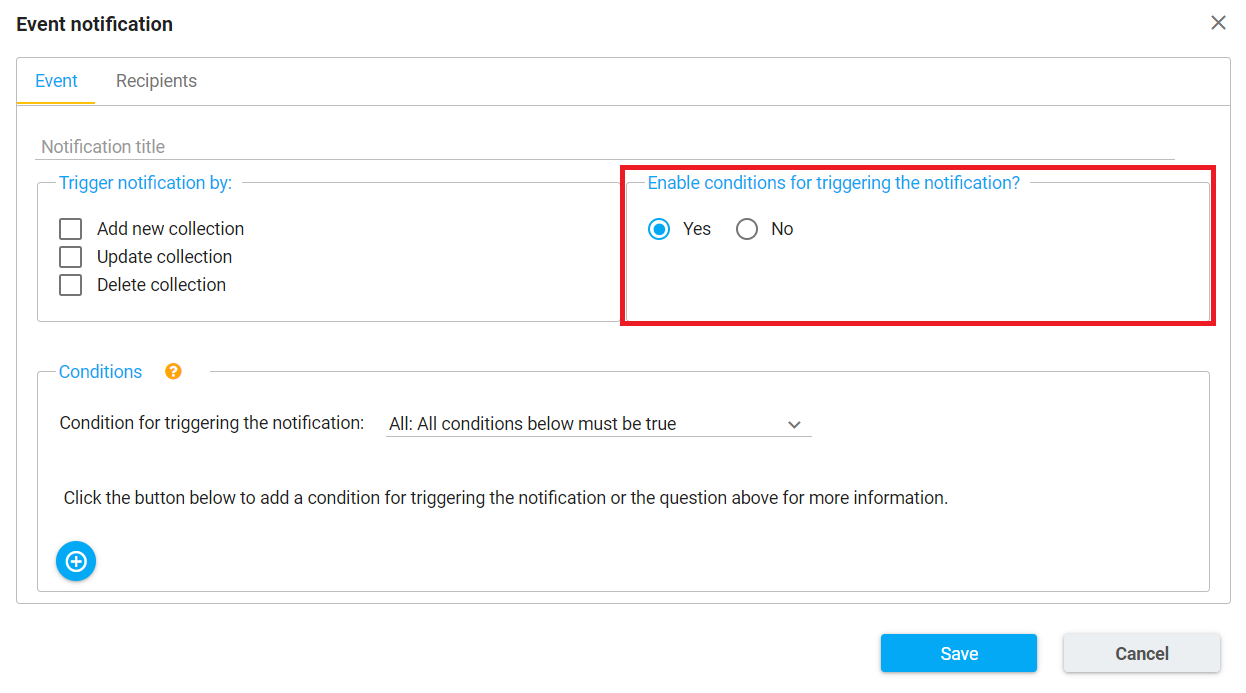
It is possible to quantify the conditions. Thus, it is possible to select whether “all conditions must be true”, “at least one condition must be true” or if “no conditions must be true”.
After selecting the logical operator, it is possible to create specific conditions for each of the questions by the button  .
.
In the example below, it is easy to see that the system will trigger the notification if a collection is made by the auditor Eric, in the accounting department:
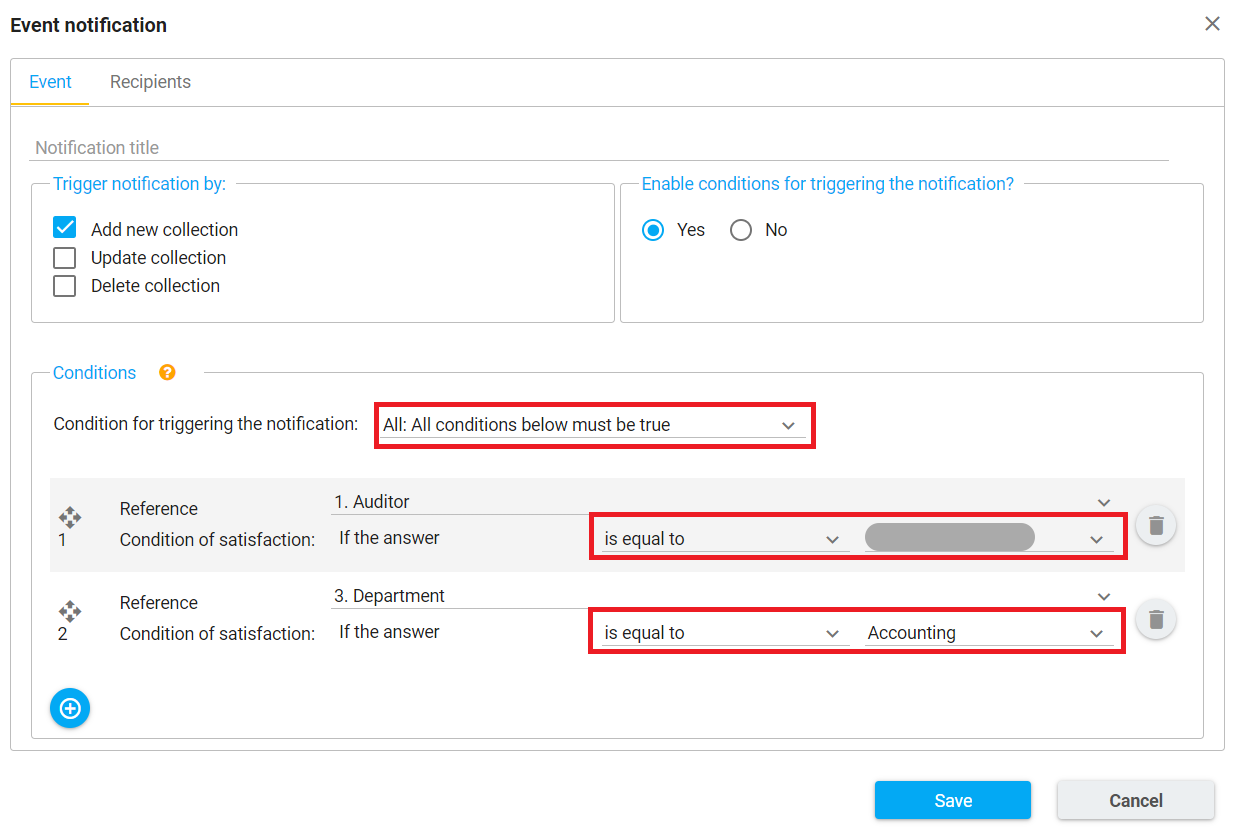
There are many possibilities for combining and there are no limits on the number of conditions, just follow the two steps: (1) select the logical operator and (2) select the condition or conditions to be satisfied, as in the example above.
After configuring items (1) and (2), select “recipients” to set up who will receive the notification created and the notification method: email or push (via app) or both.
Set up the recipients
To notify users via email, select the check box  corresponding to the user.To notify users via App, select the check box
  corresponding to the user. It is also possible to check both, as in the example below:

If the icon  appears in the e-mail field instead of the checkbox, it means that the e-mail has not been confirmed by the user. In this case, you must confirm the email to show the check box (when an email is registered in the system when the user is created, hashdata sends an automatic confirmation email).
If the icon  appears in the app field instead of the checkbox, it means that the user does not have the app installed. In this case, you must install the App to show the check box.