Creating Forms
All information on Hashdata revolves around the forms. Therefore, all data is to be collected from them. In order to create a form, click on “forms” and then on “new form”.
From there, fill the blank spaces with administrative data and create questions by clicking on “add new question” and “add add-on”. On the first case, when using the button “add new question”, all questions must follow the same creation logic. The user must establish a question and a desired answer type. The question is determined by the user, and the available answer types are: text, number, date, hour, date and hour (combined), multiple choice with one possible answer, multiple choice with more than one answer, formatted field (pre-established by the user), signature, image and location.
Step-by-step on how to create a form:
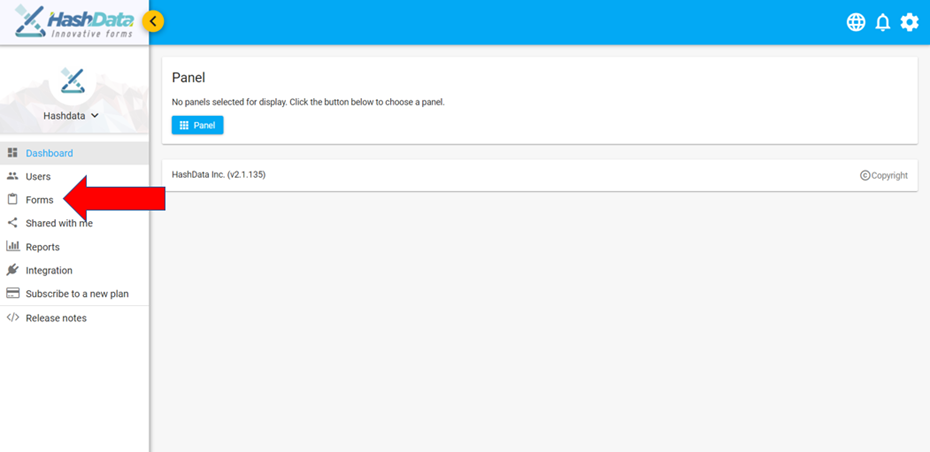
1) Forms
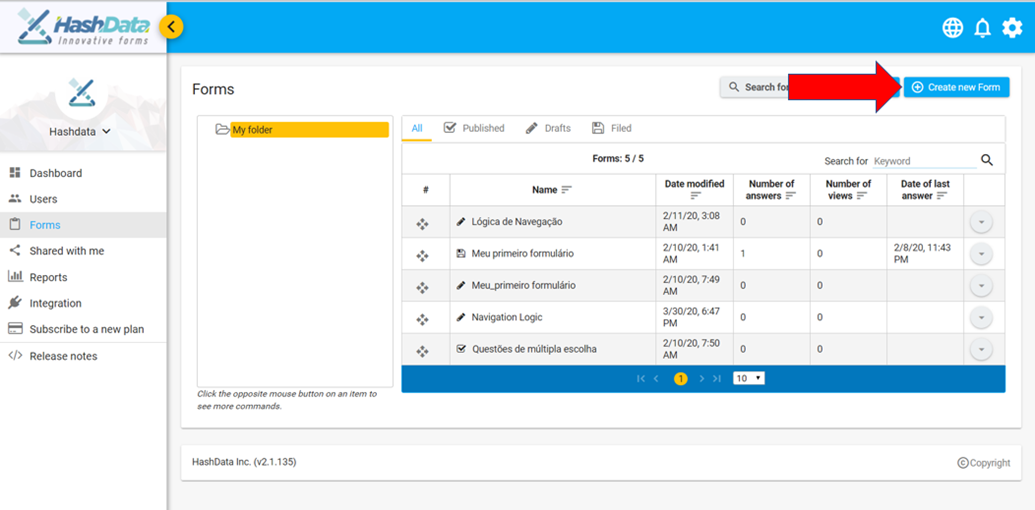
2) Create new form
3) Fill in the fields with the necessary information and click on “continue”.
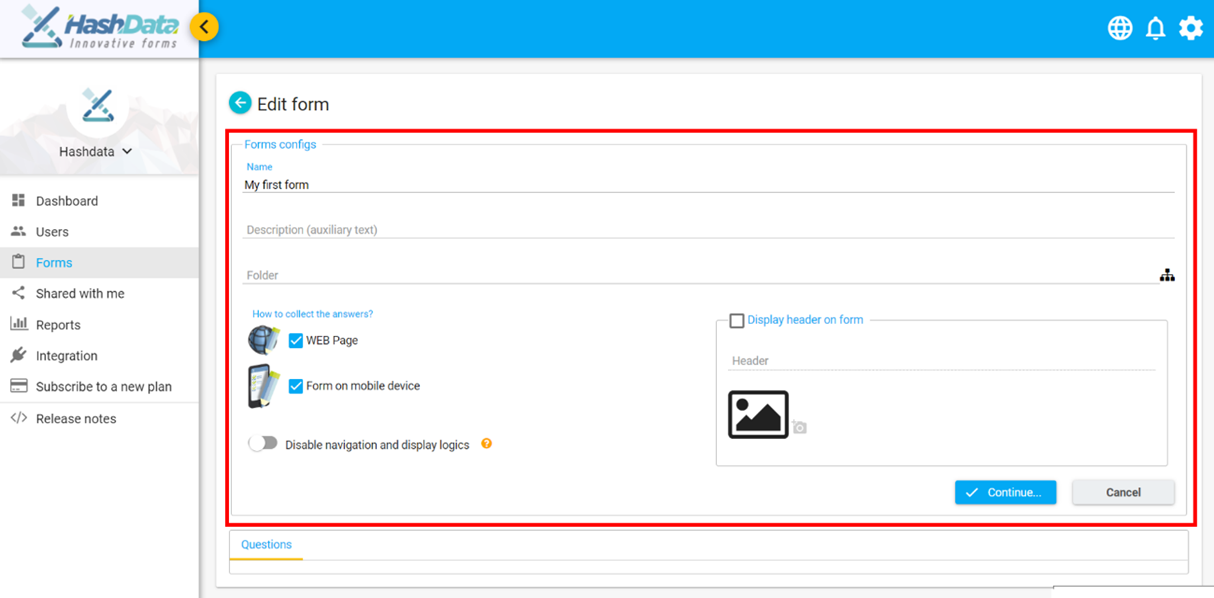
Pay attention to the following boxes:
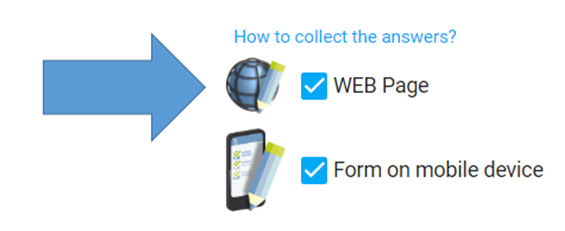
If you check the box “WEB Page”, it will be possible to perform the collection via web, from a link generate automatically when the form is published, or via QR code.

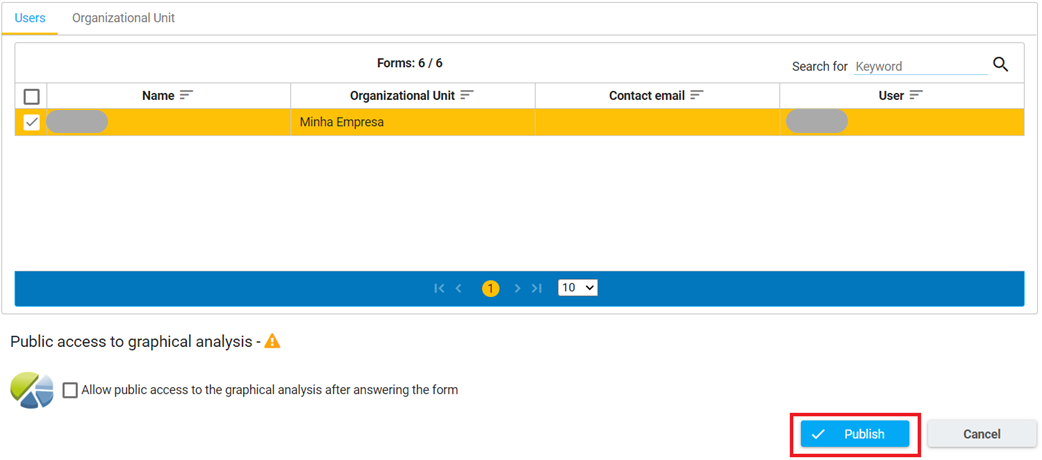
If you check the box “Form on mobile device”, the collection will be performed via app. It must be downloaded on the Playstore or Appstore (there is also an available version on Windows 10). In that case, the manager creates the users and assigns the access to them after finishing the form (refer to “how to creater users”). Select the users to which you wish to give access and publish the form, as suggested by the following picture:
How to create questions via the “Add questions” button
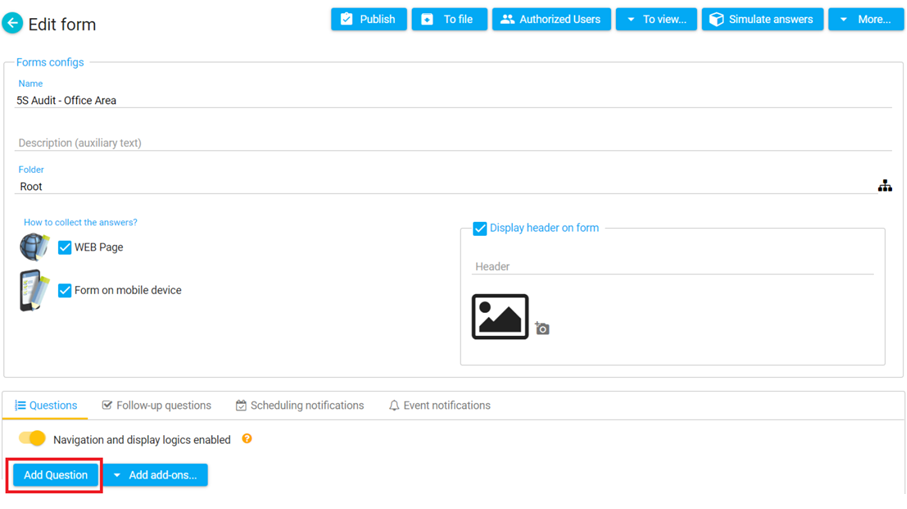
There are two buttons to create questions on Hashdata: “add questions” and “add add-ons”. In this section, we will explain the use of the button “add questions”, which is more widely used and which is located in the editing forms screen. In there, it is possible to find questions of the following types: text, number, masked field, date, date and time, signature, image (taking pictures), location (GPS), multiple choice (only one answer), multiple choice (more than one answer), rated/evaluation/satisfaction.
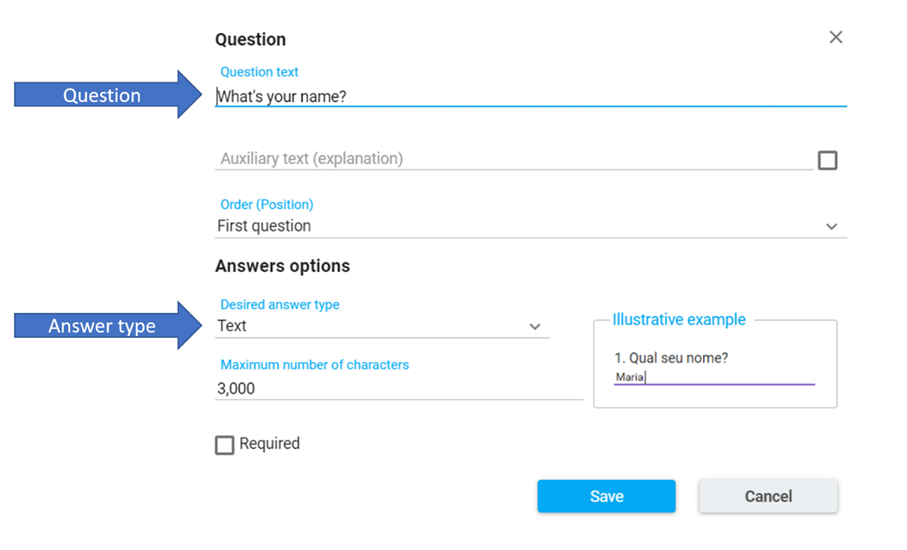
All questions created from the button “Add question” must follow the same creation procedure: 1) inserting the question text, which is what the reader will see and 2) the desired type of question. That way, for a text-type question, for instance, you may ask in 1) what is your name? and in 2) select the text type, as suggested by the following image:
If the type of the question is image, for example, insert 1) question text (e.g. “take a picture”) and 2) select the image type, as follows:
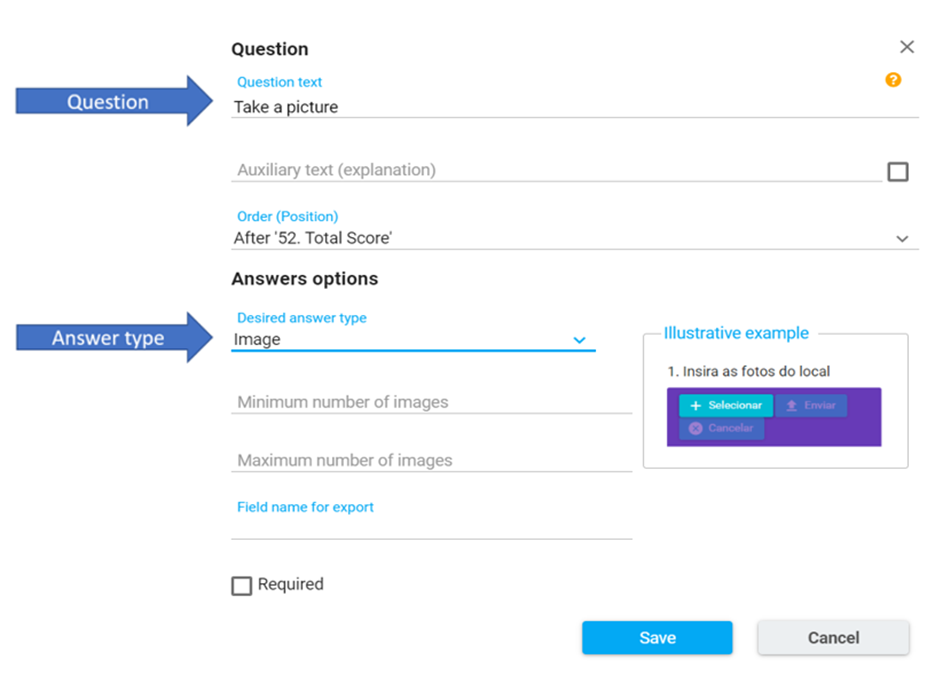
This process is repeated for any other question type.
How to create questions via the “Add add-ons” button
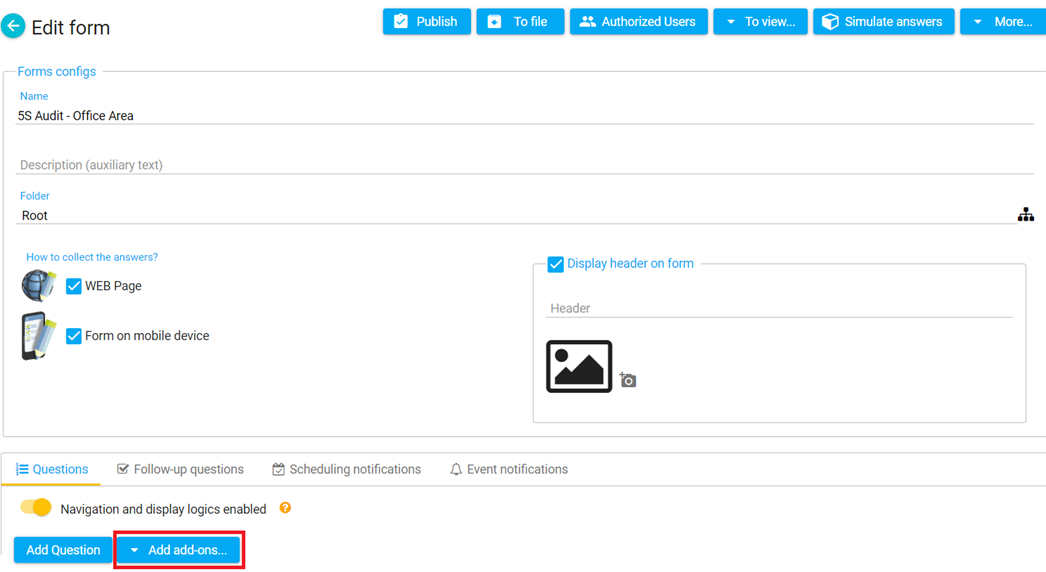
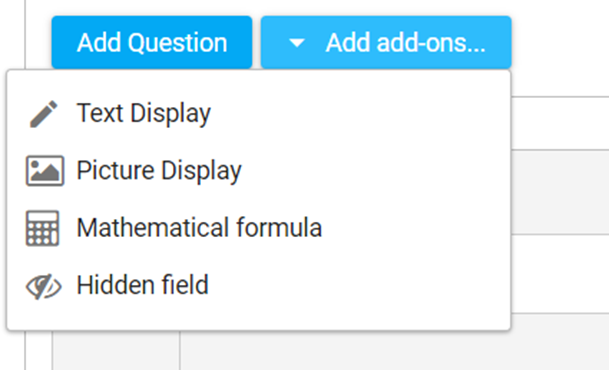
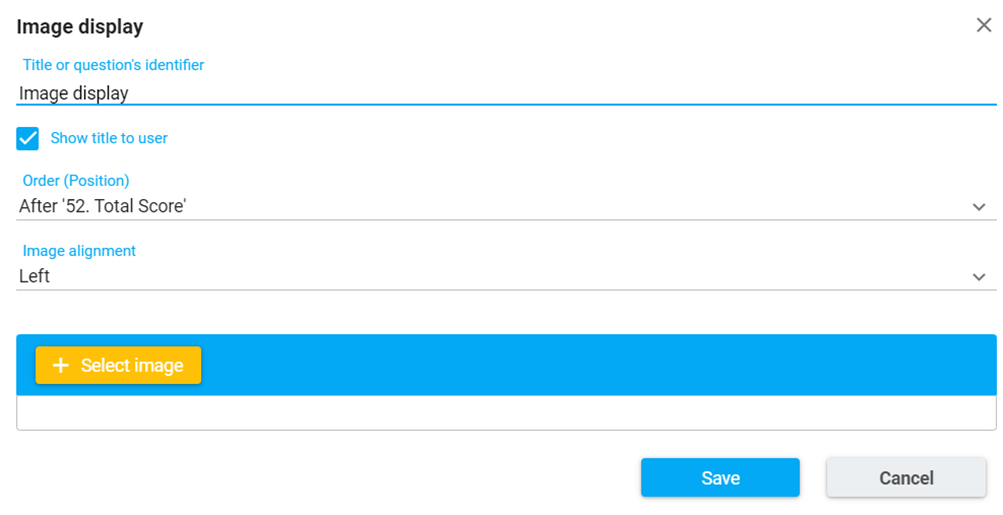
By using the button “Add add-ons”, it is possible to show images to the respondent, exhibit texts and attribute mathematical formulae to multiple choice questions. The process to exhibit texts and images is similar. This type of question is used, in general, to show some recommendation, procedure, instructions, so on. It is important to notice that these are show-only questions, so it is not possible to answer them – only to view the displayed text or image.
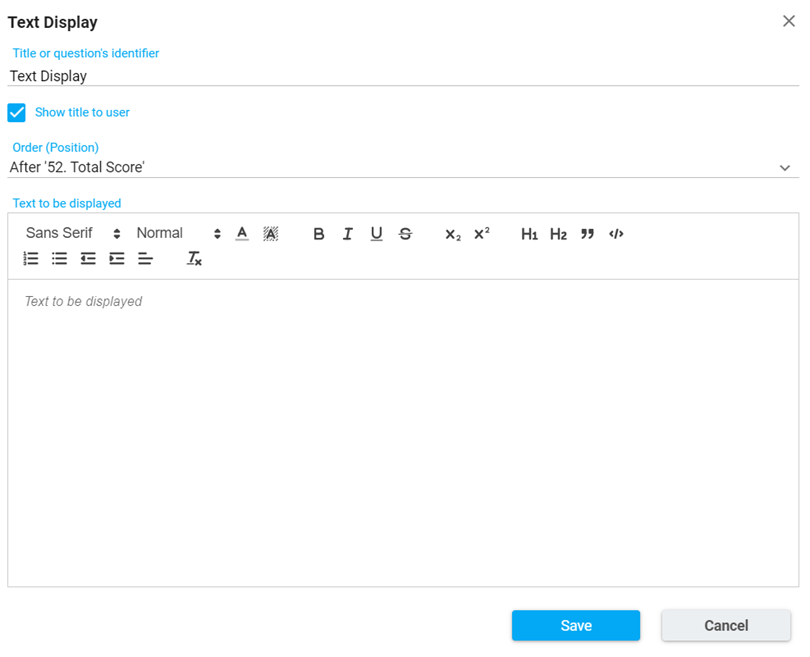
It is necessary to insert the question title (which may or may not be displayed to the user) and, then, fill the text field with the text and set it according to your needs. When it is done, save it.
To create an image, the process is similar: fill the box with the question title, choose if the title must be displayer to the respondent, set the alignment, choose the image and save.
Inserting mathematical formulae
The questions of the type “mathematical formula” are used to perform arithmetical calculations from the answers given. This type of question is attributed to multiple choice questions with only one answer or questions of evaluation/satisfaction. There are, fundamentally, two steps to create a question like this: 1) attributing values to the answers of a multiple choice question with only one answer or of evaluation/satisfaction and 2) performing the desired calculation, which will be detailed below.
1) How to attribute values to answers in a question
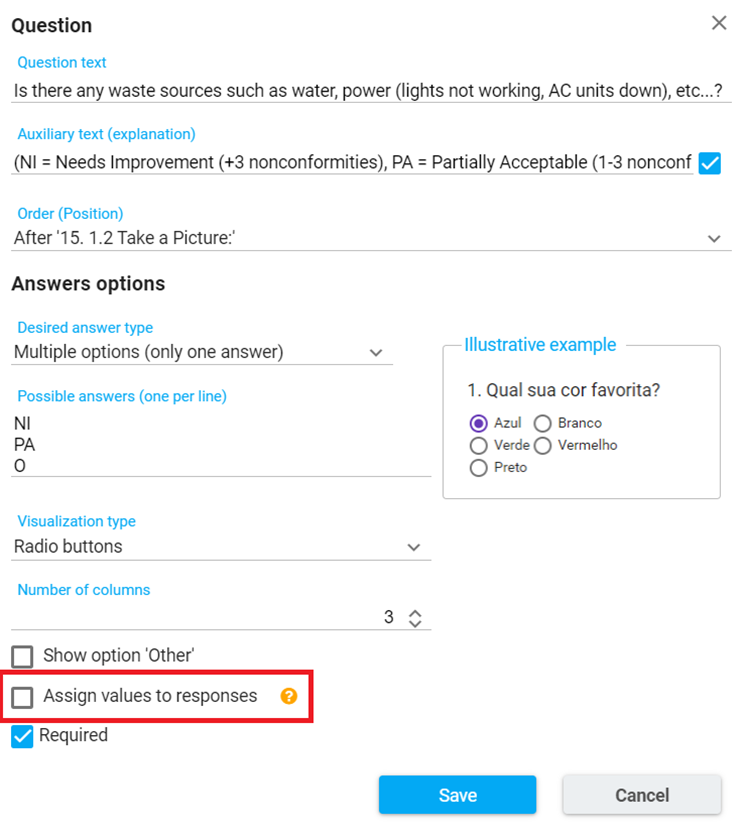
Open the desired question (multiple choice with a single answer or evaluation/satisfaction) or create a new question of this kind and click in “assign values to response”.
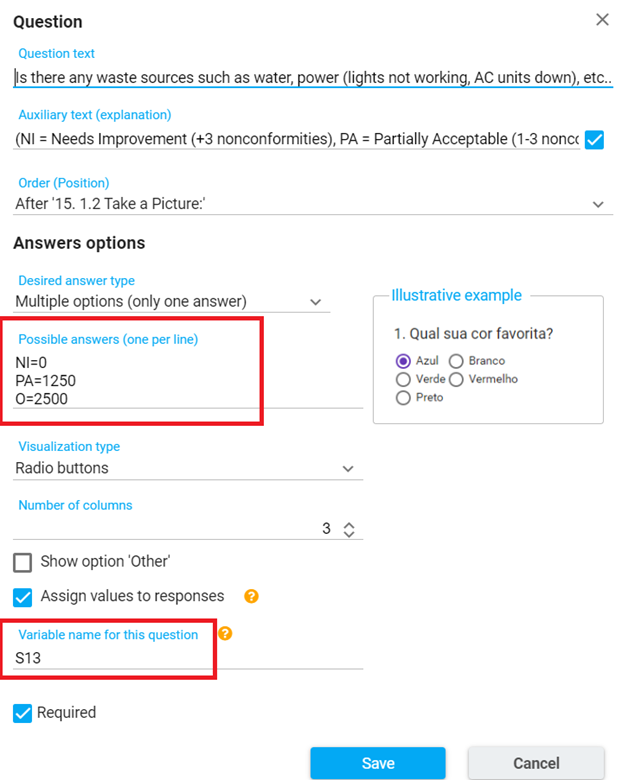
Insert the desired values after the “=” sign and name the question in the field “variable name for this question”, as the following image suggests. After it is done, save the question.
How to attribute mathematical formulae to questions with values
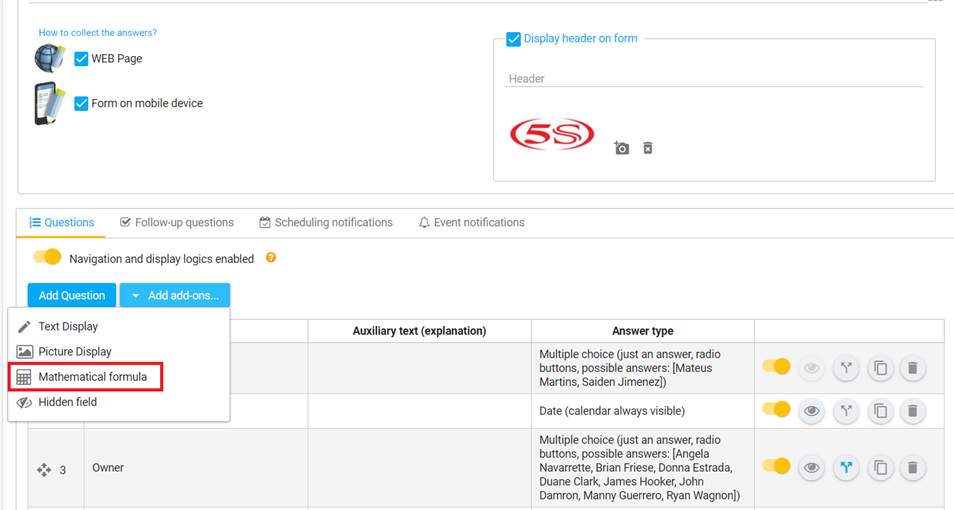
After performing the first step on all questions to be calculated, it is time to create the mathematical formulae. Click on “add add-ons” and, then, on “mathematical formula”.
The following editing layout will appear:
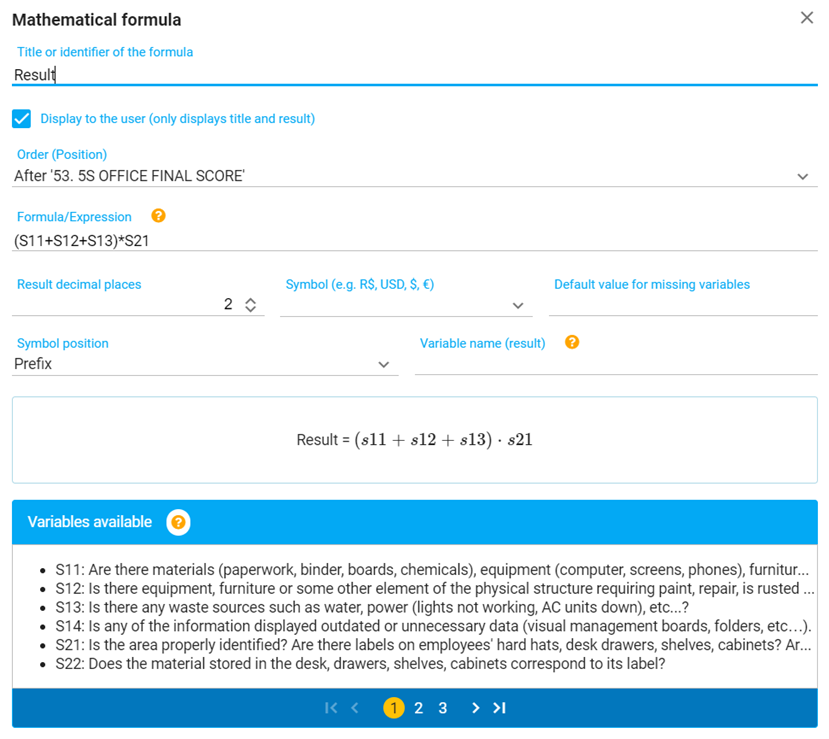
On the field “formula/expression”, insert the desired formula. On the case of the example - (S11+S12+S13).S21 – the signs supposed to be used are:
| Operation | Symbol |
|---|---|
| addition | + |
| Subtraction | - |
| Division | / |
| Multiplication | . |
All questions that had been through step 1 will appear on the field “variables available” and will be available to the accounts.

Creating users
(Screen: users » create user )
The functionality “create user” assigns login and password to a newly created user. From these credentials, it is possible to access them system and, consequently, the forms made available by the account manager. From there, it is possible to perform data collection and access other functionalities in the system, depending on how it has been adjusted. It is recommended that the usernames correspond to the users’ e-mails because the system (in its entirety) does not accept users with the same name. Apart from the credentials, it is also necessary to assign an access level to the brand new user, which may vary according to the manager’s needs.
Access levels
The access levels are the permissions attributed to the users. Below, there is a description of each one of them. It is important to remember that the permissions are cumulative – that is, it is possible to assign more than one (or all) to a single user.
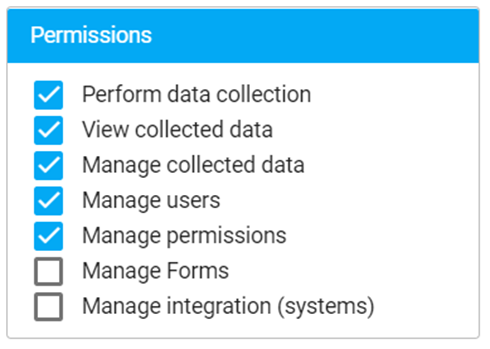
Perform data collection – This is a basic permission level, in which the user is only able to collect data in the app.
View collected data – Also a basic permission level, in which the users are able to view the data collected.
Manage collected data – The users are able to manage the collected data.
Manage users – The user is able to manage other users, creating or deleting them, as well as generating pre-sign up links and so on.
Manage permissions – The user is able to establish the access level of other users in the system.
Manage Forms – The user is able to manage forms, creating, editing, publishing, archiving, and attributing them to users, etc.
Manage integration (systems) – The user has access to integration scripts on Hashdata, as well as to integration with other systems – for instance, the Qlikview.
ATTENTION! When managing the access levels of a certain user, make sure that the selected level really is the desired level. A user with all permissions gains the status of super user, being able to make any changes to the access account, including deleting information permanently.
Creating users via account manager or via user with managing permissions
(Screen: users » create user) In this mode, the account manager creates each user (generating login and password) and attributes the access levels manually.
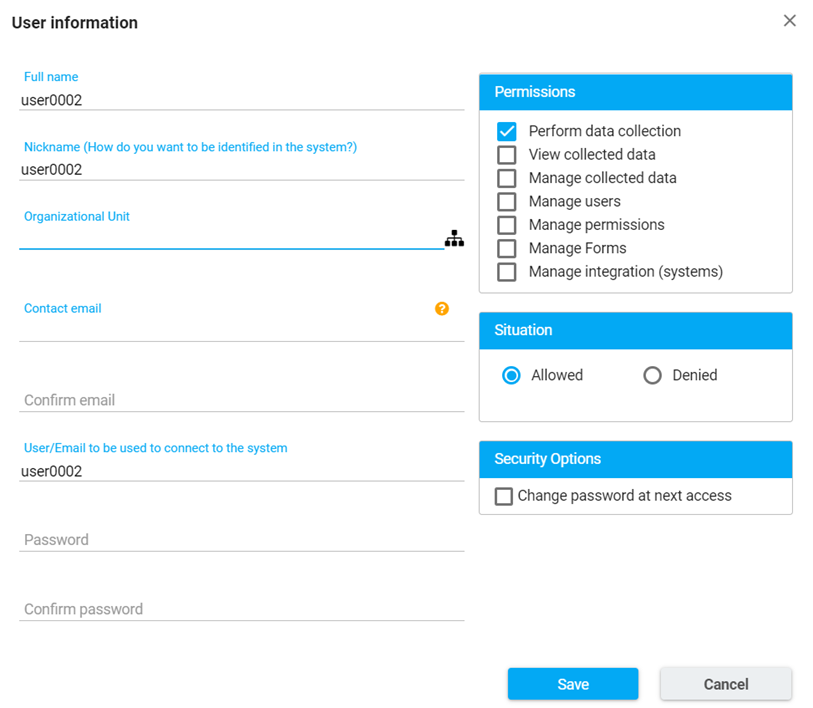
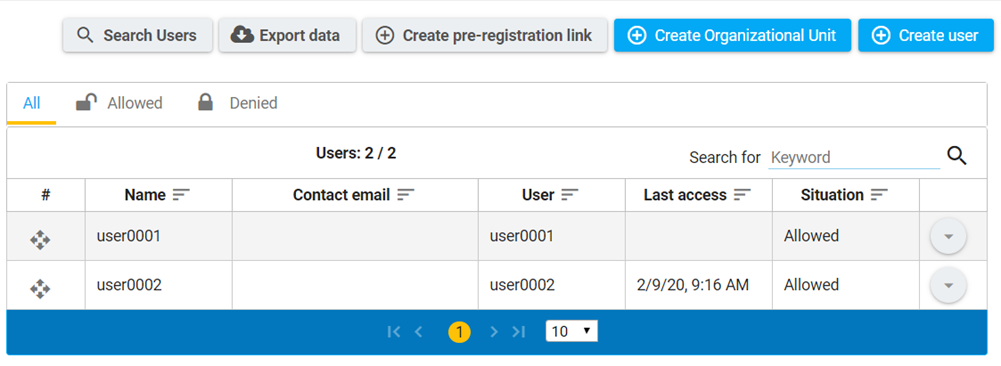
As they are created, the users appear in the managing screen, where it is possible to make changes later:
Pre-sign up links
(screen: users » create pre-registration link » create new link)
In this mode, the account managers pre-sets the access levels desired and a link is generated automatically. From this link, anyone who accesses it is able to fill the fields with their information. That way, if the manager needs to register hundreds of users who are only supposed to collect data, a simple alternative is to assign the option “perform data collection” to all users registered via this link.
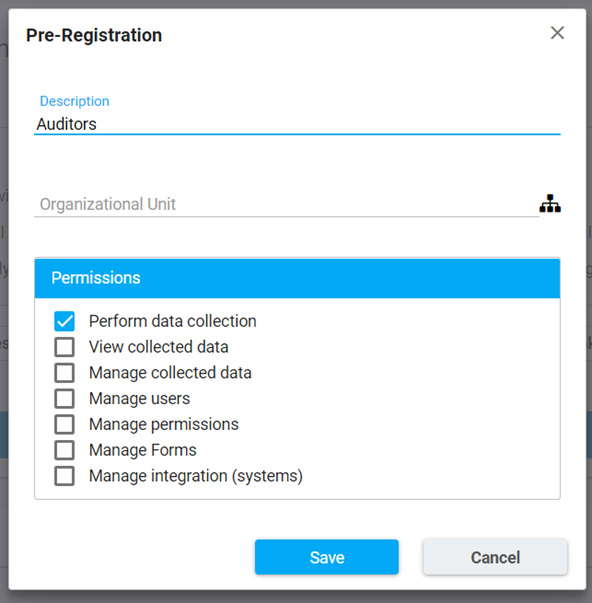
After clicking on “save”, the link will be generated:

All users, whether created via link or manually, will appear on the managing screens – user manager screen or attribution of forms to a user.
Attributing forms to users
(screen: forms » publications)
There are two ways of attributing forms to users: 1) via the screen of the form to be accessed or 2) via the screen of the user to be granted access.
1) Access via forms screen
Open the form. If it is already published, click on “Authorized Users”
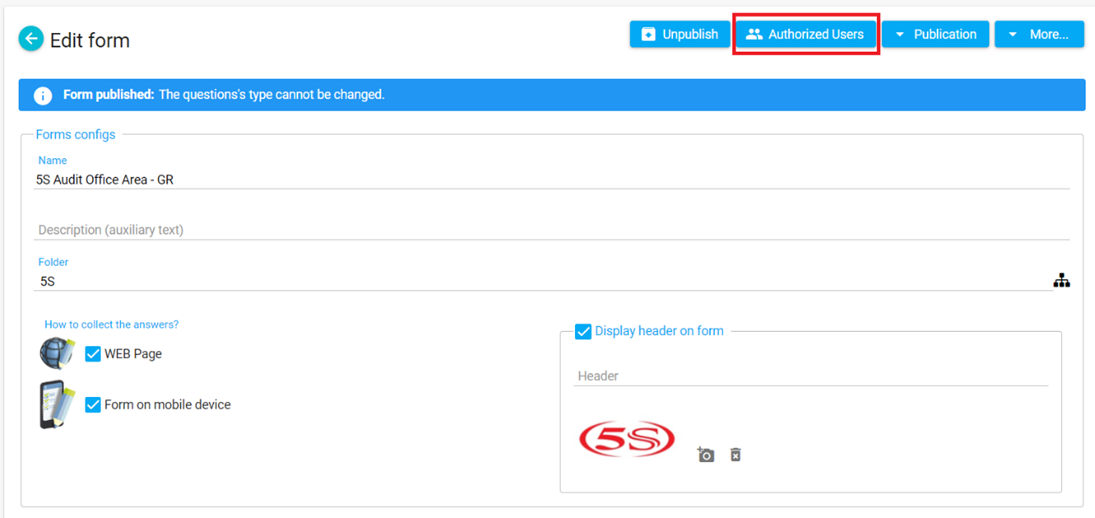
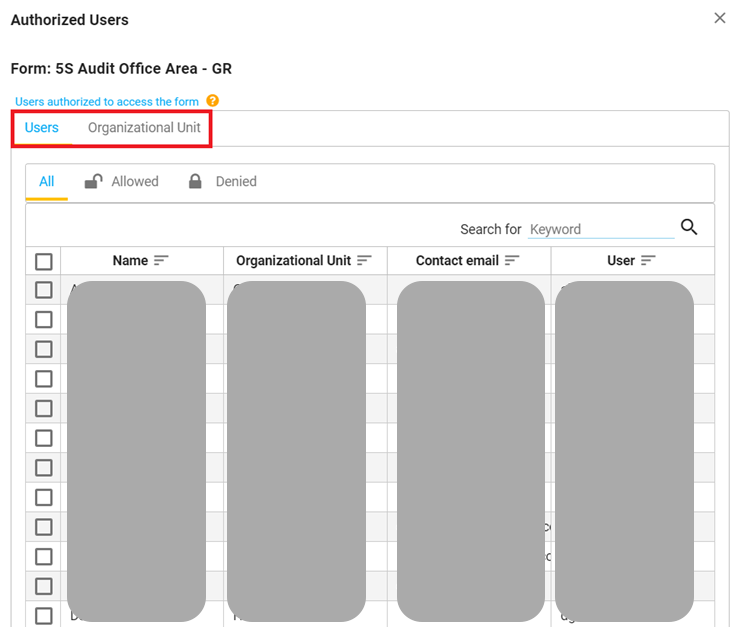
Attribute this form to the desired user. It is possible to attribute forms to user or organizational units, as the following image suggests:
If the form has not been published yet, click on “publish”.
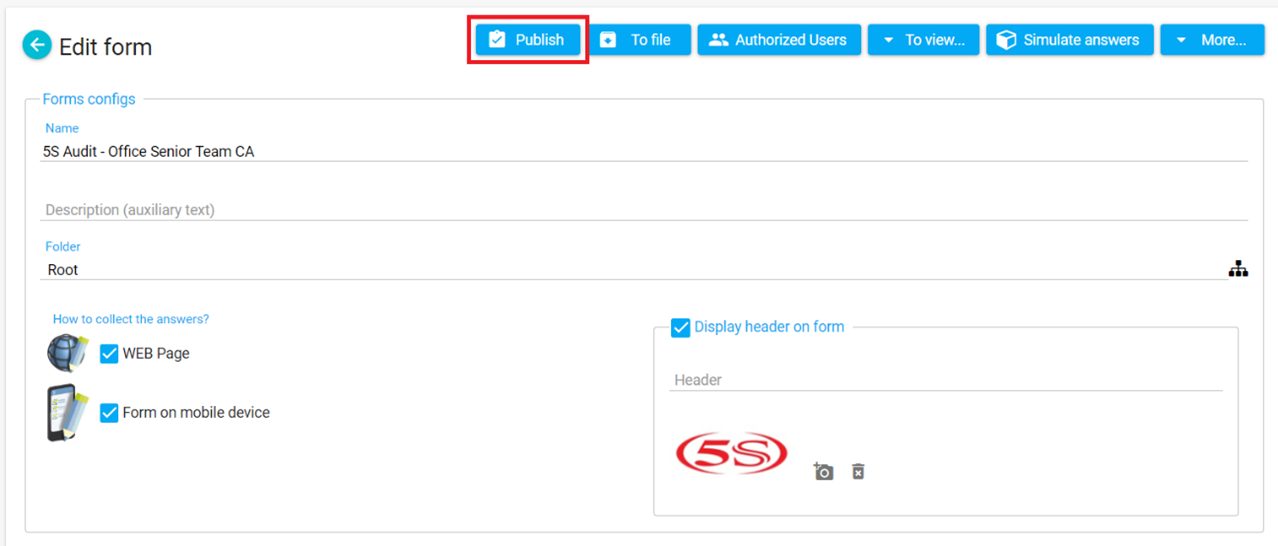
Select the users individually or by organizational units.
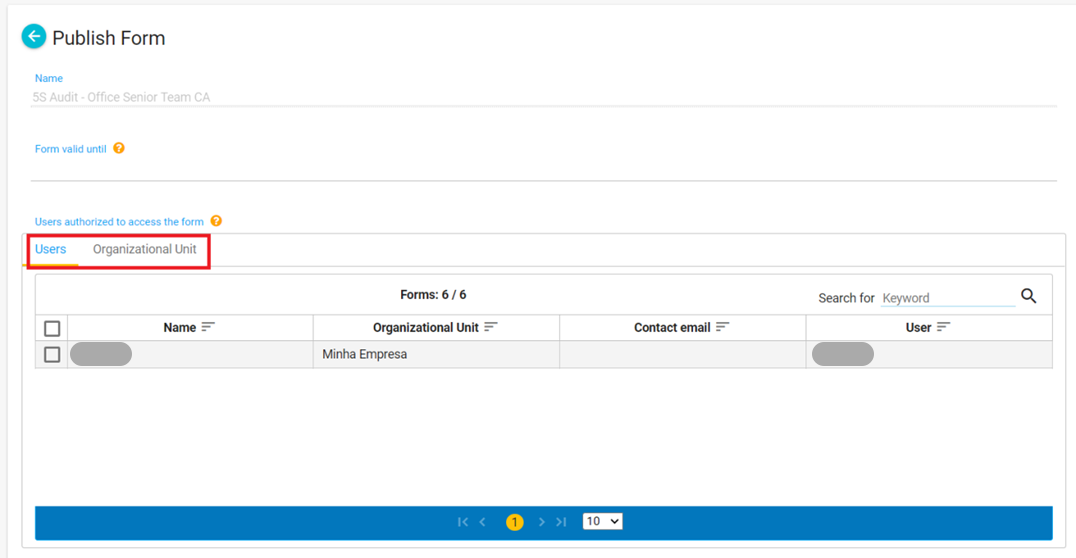
2) Access via users screen
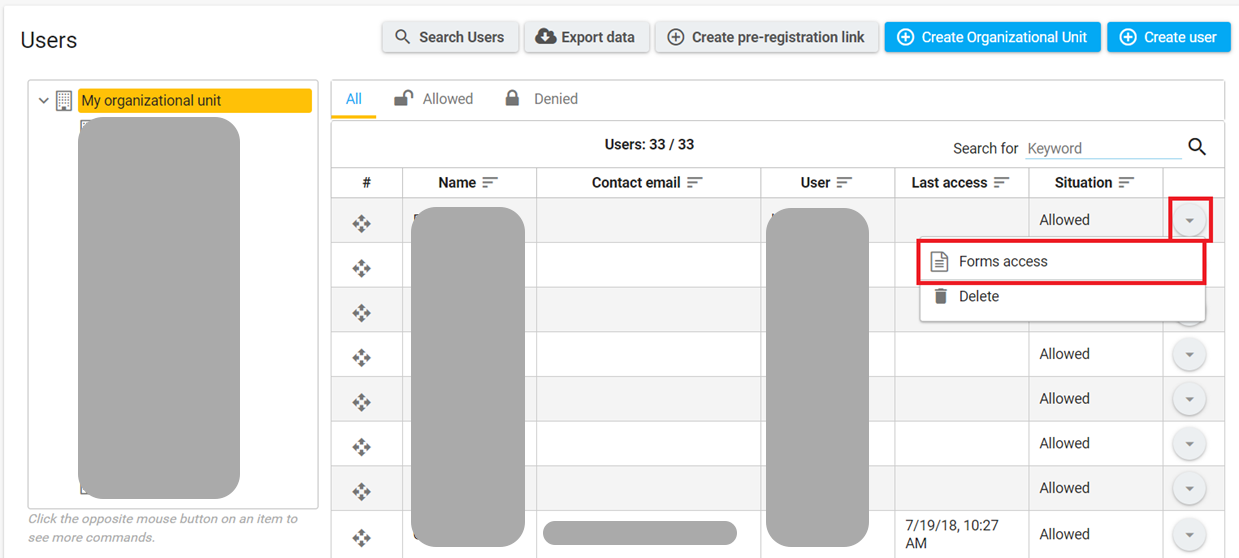
(Screen: users) Open the user screen and click on the button  , next to the user to which a form must be linked. Then, click on “forms acess”.
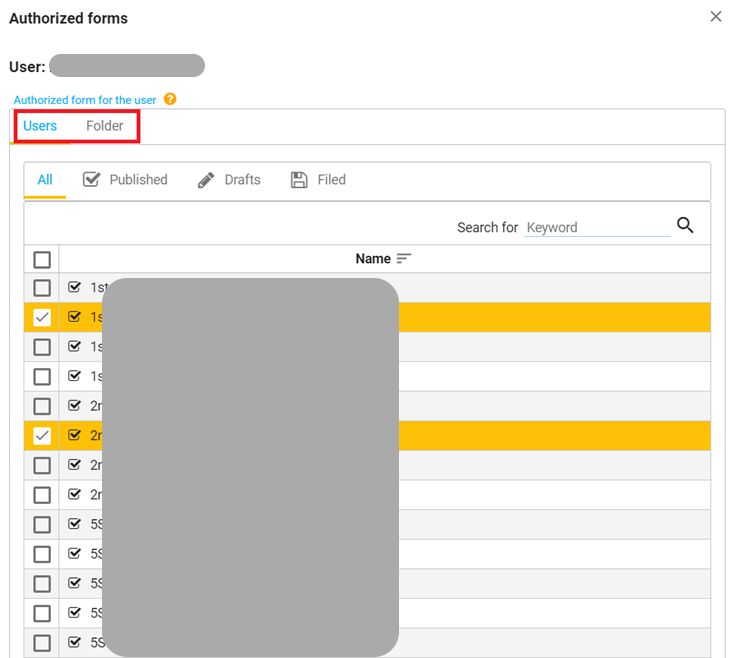
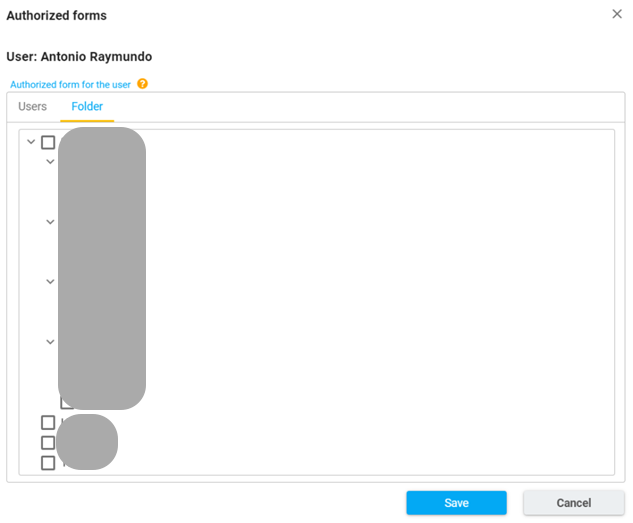
Attribute the desired forms or folders.
Analyzing data
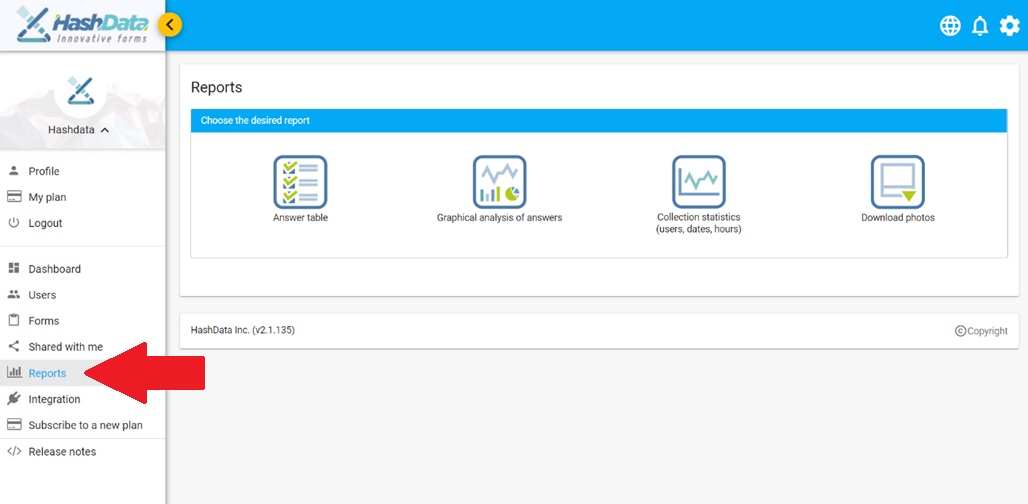
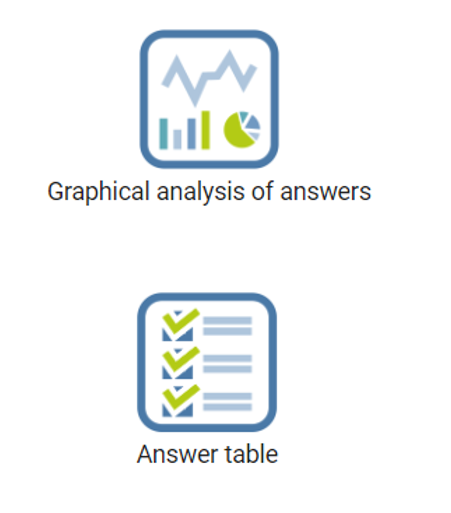
The analysis of data is the resulting process of the data collection; There are two different ways to perform this analysis: 1) graphical analysis and 2) answer tables. Both are closely related, since it is possible to create filters in a screen and generate reports in the other and vice-versa. They can be accessed via the screen reports on the initial menu or via the editing screen in the form.
Access via reports screen
(screen: reports)
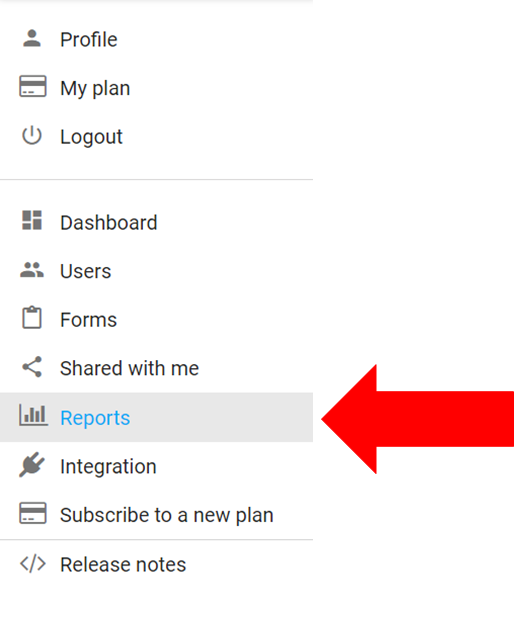
Access via the reports screen on the initial menu:
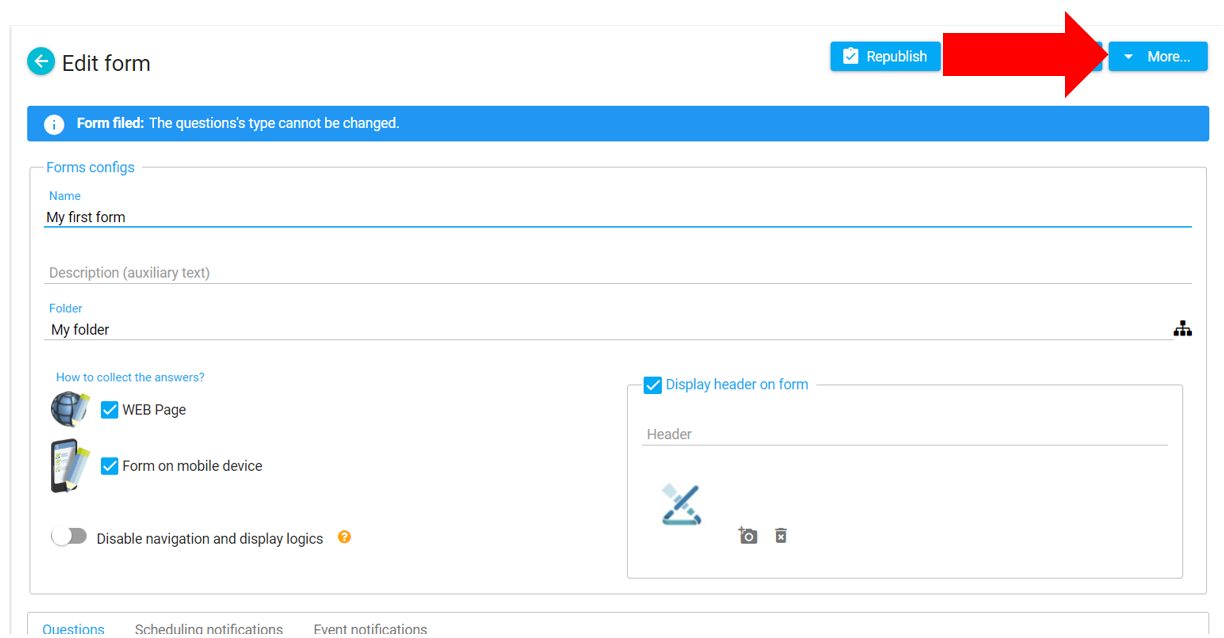
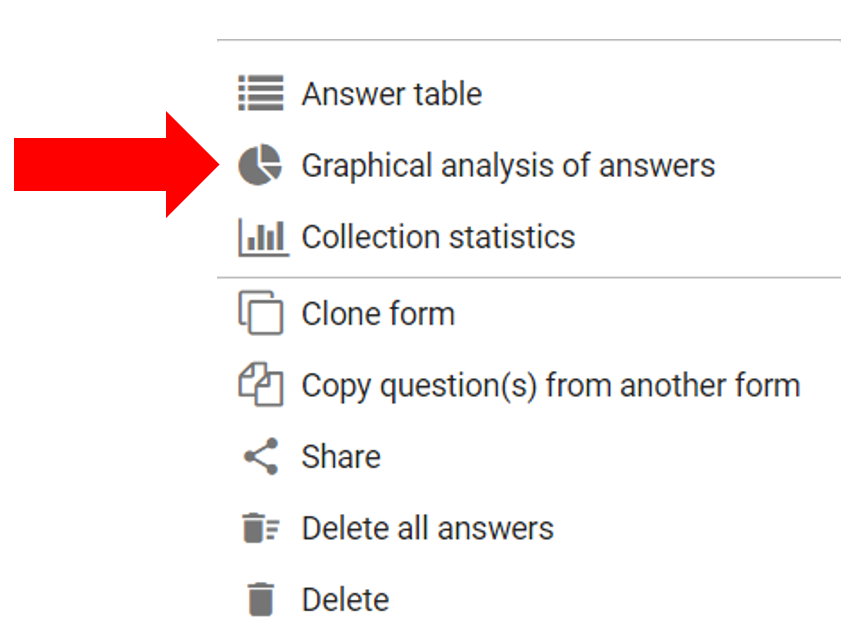
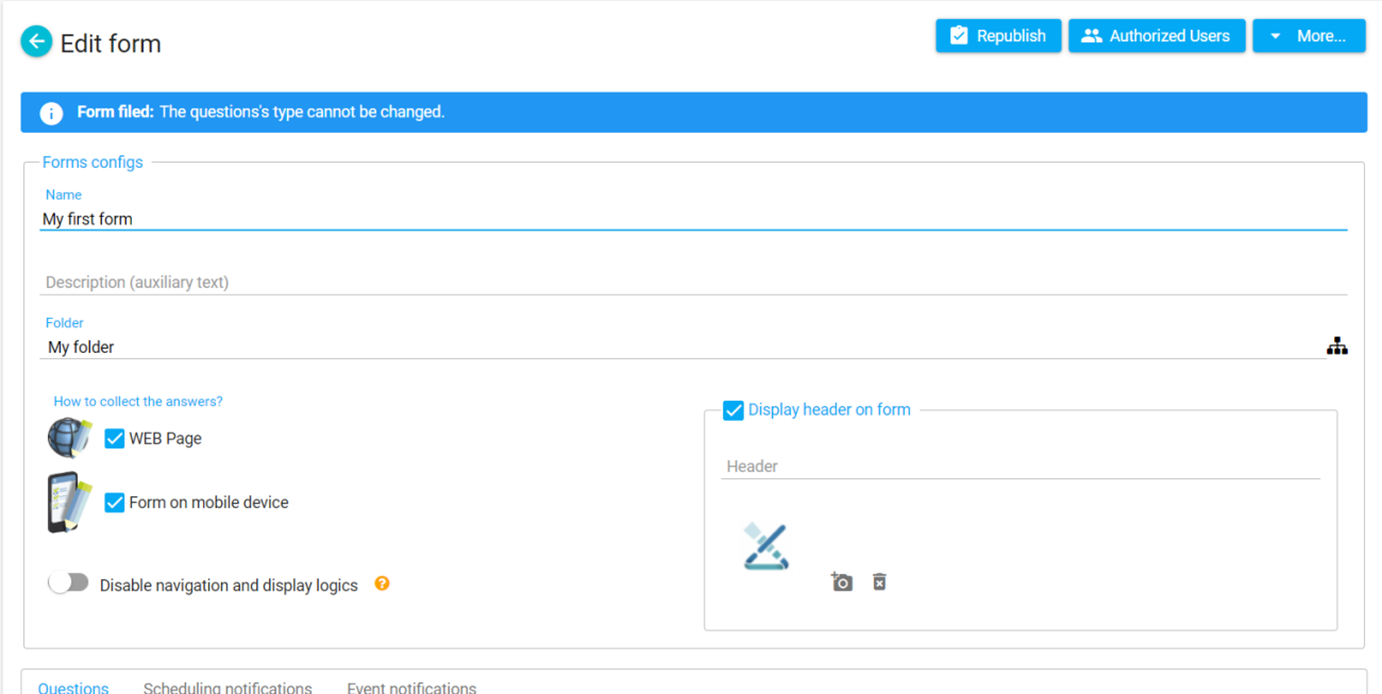
The graphical analysis will be accessed via the editing screen in the desired form. On the top right corner, click on more » graphical analysis.
Access via editing screen
(screen: forms » choosing a form » more » graphical analysis of answer)
Answer table
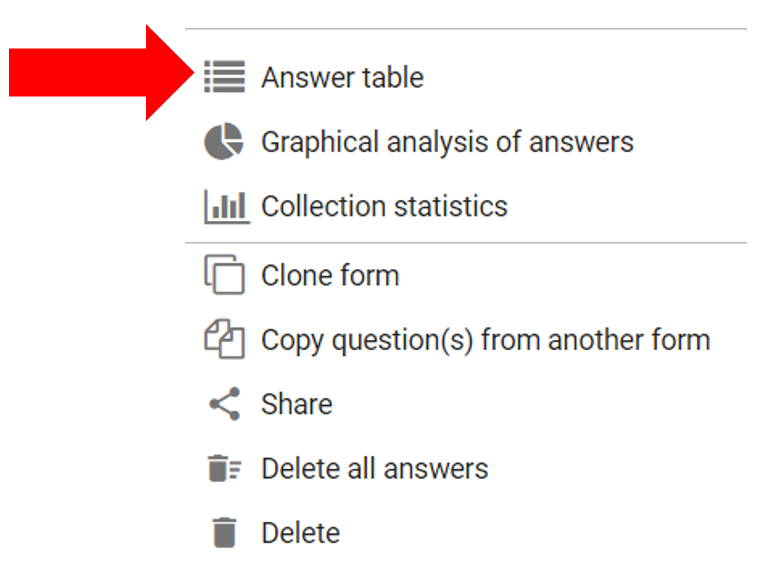
(screen: forms » choose the form to be analyzed » more » answer table)
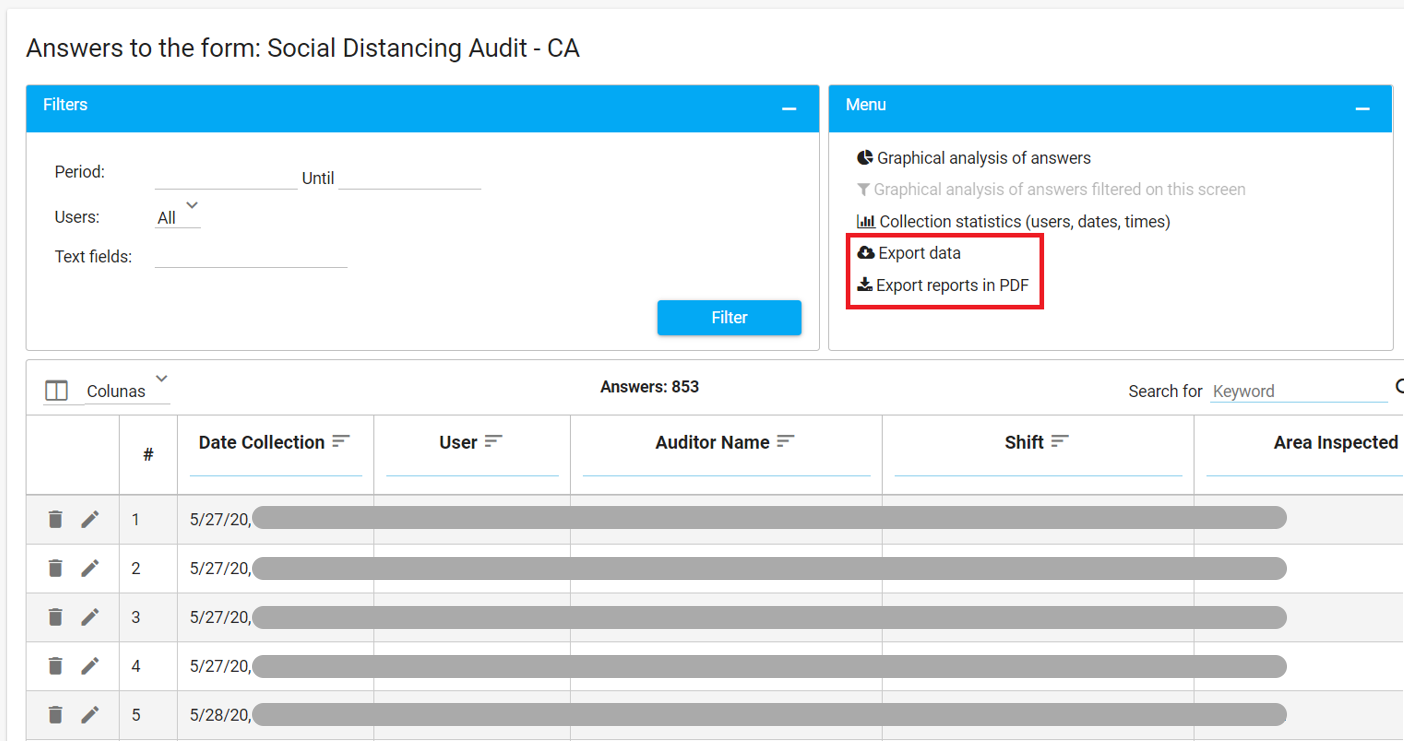
By clicking on “answer table”, it is possible to generate collection reports in PDF or export the data in XLS or CSV.
It is possible to generate a general report or a report filtered by period:
